How to Do Picture Study
In the first post of this series, I wrote about why picture study is important to me, and in the last post, I wrote about why picture study should be important to everyone. Now that we have the reasons why we should include it, we’ll dive into the more practical side… how to actually do Charlotte Mason picture study.
I’ll be referring back to many of the resources I mentioned in my last post, so if you’re not familiar with the various organizations with which Charlotte Mason was associated, you’ll want to read the introduction there first.
My hope in offering this post is that you can see just how simple picture study is and that simplicity is the intention! As homeschoolers, we always want to provide our children as much as we can in their education, so their knowledge of a particular subject is well-rounded.
However, picture study follows suit with all other things in a Charlotte Mason education. The importance is less on the amount of knowledge they have about a particular piece of art but more on the strength of their relationship with that piece of art. In School Education, Ms. Mason wrote: “What a child digs for is his own possession; what is poured into his ear, like the idle song of a pleasant singer, floats out as lightly as it came in, and is rarely assimilated.” (page 177)
I know some claim that they have no artistic background or no knowledge of art history, so they can not possibly teach picture study effectively. However, picture study is not about your knowledge as a teacher but about how you allow the student to interact with that piece of art and take it in on their own. As Ms. Hammond said at her PNEU Conference talk, “The teacher will probably find she has a very small role to play, her part being merely to secure attention for some point that the child is inclined to overlook, and to explain in a few simple words those problems that the child cannot solve for himself. Definite teaching is out of the question; suitable ideas are easily given, and a thoughtful love of Art inspired by simple natural talk over the picture at which the child is looking.”
More practically, in her PR article on picture study, Marjorie Evans wrote, “A knowledge of the technique is vastly interesting, but it is possible to love to study pictures without having any particular artistic talent. I say love to study them because studying them from a utilitarian point of view is more the work of the specialist than of the amateur.” Ms. Plumptre also wrote: “All that is needed [to teach Picture Study] is enthusiasm and interest for pictures and understanding of children.”
I also think this quote from a PNEU Teacher’s Handbook sums up the teaching of picture study well: “Parents who are not very familiar with Art need not feel daunted by the idea of teaching Picture Study; teacher and pupil can learn together very successfully in this subject.”
I love the idea of teacher and pupil, or parent and child, developing relationships with art together.
The What
To start with the basics, in the Parents’ Union Schools, the students would focus on one artist per term by looking at six of his or her paintings. One painting would be the focus for two weeks during one twenty-minute picture study session per week.
We follow this same format in our homeschool and co-op (with some variation on time, though never more than twenty minutes), introducing the artist and/or the new piece in the first week by looking at it and narrating. The second week, we review what we learned in the first week and then discussing it more. Methods for both of these activities are outlined below.
How to do Charlotte Mason Picture Study
And now, we arrive at “the how.” First, I will emphasize that there are just two things that are the most essential parts of picture study: allowing the student to look at the painting silently for a few minutes and then having them narrate afterward. If you put the painting away after that and do nothing else, you have done enough.
This is all that is necessary for picture study. I truly want to drive this point home as I think this is where so many homeschooling parents get a little disoriented. Just looking and narrating? No biography on the painter? No discussions on technique? No exploration of the movement as a whole?
That’s it?
Yes, that’s it. That is all! That is all you need to do for picture study. Just by doing this little, tiny bit, you are allowing your child to develop a relationship with a piece of art. And that is ultimately what picture study is all about. In her PNEU pamphlet on Picture Study, E. C. Plumptre wrote: “It is the child’s contact with the work of the artist that takes foremost place.”
With that said, there are definitely other things you can include in picture study that will allow that relationship to blossom, which I’ll discuss here. However, beware that you don’t add too much and make picture study into something it’s not like a history lecture, or a biography reading, or a drawing lesson.
Picture study is about the art itself, and unless what you’re adding allows your student to develop a stronger relationship with that piece of art, it should not be included. From Ms. Plumptre’s pamphlet: “The grown-up who takes the lesson is an all-important middleman, but, like other middlemen, she must be lost in the background. There are many pictures that make their own independent appeal. Her judgment must tell when the helping word is needed, or when — as is specially the case with older children — too much speaking or over-much enthusiasm may be a barrier.”
Below I’ll go through a typical picture study lesson that I’ve done many times both at home and in our homeschool co-op over the five years with students from a wide range of ages. Again, however, I want to emphasize that this is not the only way to do picture study. This is just a glimpse of what it can look like. Here’s a summary:
How to do Picture Study
Total Time: 15 minutes
Look at the art.
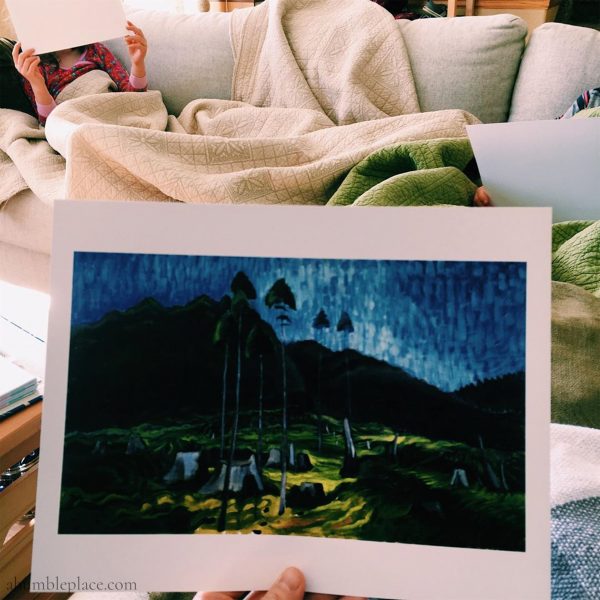
You can give your students individual prints or everyone can look together from one copy or on a screen. This should be a quiet time with everyone simply studying the art. Remind your students to try and see all of it in their mind’s eye when they close their eyes. If not, they can open their eyes again and study the part of the picture that’s still unclear until they can see it in their mind.
Narrate what you saw.
Take the art away so no one can see it and then have each student narrate what they saw. Don’t interrupt or try to get them to mention specific parts of the piece. Let them tell you what stood out to them. If they have trouble, ask them to describe the painting to you as if you had never seen it before.
Optional: Further discussion.
After everyone has had a chance to narrate, you can have everyone look at the art again and discuss it Address any questions that came up during narration and if there is a story behind the piece, you can share that at this time. (See below for more ideas.)
Also, if you’d like to see this all laid out in video form, I made a short picture study session overview for a Vincent van Gogh piece that you can view here.
Background
During the first week of the term, I introduce the artist we’ll be studying to the students. I generally print out a painting or photograph of the artist and show it to them during that first session. I will tell them in which century the artist lived, but I do not mention specific years of his or her life.
I then tell the students where the artist was born (or spent the majority of their childhood) and pull out a map, allowing them to find that location on the map. This is followed by a very brief summary of the artist’s life or a story from his or her childhood.
To prepare for this part, I look for a short (meaning just a few pages, if that) biography to read. If you’d like to read a longer biography, I highly recommend it as learning more about the artist’s life can be a wonderful way to add depth and meaning to their work. However, I do understand that not everyone has time for this.
Sources for shorter biographies can include encyclopedia entries, brief biographies at the beginning of an art book that contains that artist’s work, and older books that are freely available on sites like Archive, Gutenberg, or Google Books. Sometimes you can find a compendium of artists that contains many short biographies that is useful as well.
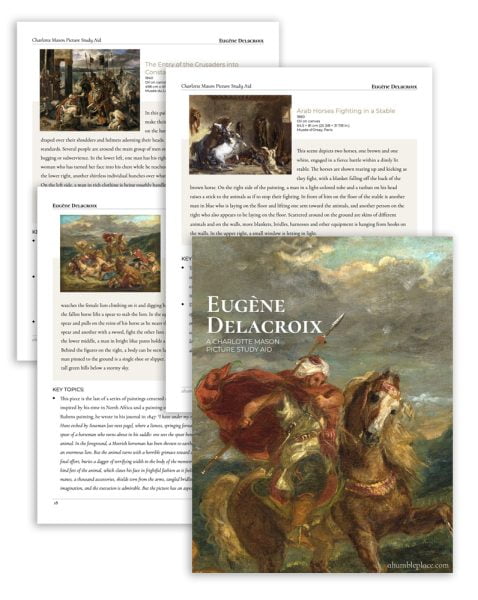
Alternatively, in the Picture Study Aids that I offer, I do include either brief biographies or stories from the early part of the artist’s life.
Then, during our picture study time, I essentially summarize (or narrate!) what I read in the biography for the students, focusing particularly on the artist’s childhood and how he or she became an artist. I might also touch on a part of the artist’s life that inspired them to paint the way in which they did.
This segment shouldn’t be too long as picture study really isn’t about the life of the artist. Ms. Plumptre wrote: “…it is convenient to consider the question of how much of the life of the artist children need to know. The general principle is — only so much as is really necessary to the enjoyment of his pictures…”
After this, if the location is known of the painting or piece we’ll be looking at that day, I’ll have them find that on the map as well. This is particularly helpful for artists who moved around often.
If this is a later week in the term with a new piece from an artist to whom we’ve already been introduced, I generally start by asking what the students remember about that artist and then ask them to review for me the painting we learned about during the last session.
If the new piece was done in a different location, we’ll take out the map again and find that location. If there is any biographical information that’s pertinent (eg. the Civil War began and he witnessed it, etc.), then I’ll very briefly mention that as well.
Quiet Looking Time
After this, I hand out the individual prints face down to all of the students, then tell them that they may flip them over. I remind them to look at their prints quietly until they can see the image in their mind or, as the PNEU Teacher’s Handbook put it: “…looking at the picture so well and carefully that he will have a clear mental picture of it, noticing the colours and general pattern and shape. He might look at the picture, close his eyes, then look again and compare the mental picture he made with the one before him.”
If you don’t have individual prints, you could also display the piece on a screen, or if you have one large print, such as from a large-format art book or calendar, that could be shared as well. I have found that students, especially younger ones, are generally able to focus more easily if they have their own print, but I know that this is not always possible.
This quiet time of looking can last anywhere from three to five minutes or longer. With the students I’ve taught, the younger forms (or approximately grades 1 through 4) generally start getting fidgety around the three-minute mark. Older students are more apt to take their time. Usually, when there is one minute left, I give a warning, and when the time is up, I ask if anyone needs more time and take longer if necessary.
Narration
We then flip our prints over so we can’t see them and begin narration. There are several ways to do this, but the most traditional way is to have the students tell back what they saw. I like to go around the room, so each student has a chance to speak on their own. Ms. Plumptre said about this time: “Many children love to ‘chatter’ about the picture, and it is right that there should be plenty of free discussion. But if this is quite unrestricted there is the danger that it may degenerate into mere chatter, and also the possibility that the bolder child will come out with everything before the quieter one has a chance to express himself.”
You’ll find lots of different narration styles, and that is fine. I have known students who liked to count multiple objects in the scene (eg. ‘there are thirty-two trees’ or ‘there are five clouds’) and other students who noticed the animals first (one student, in particular, had an affinity for cows). As Ms. Evans shared in her article: “Each pupil in the class will find something of special interest to tell you about the picture, someone will be sure to want to count the lances in the background, it is not exactly an important item, but do remember that children appreciate detail.”
If this is your first time doing picture study and your student is hesitant to narrate, this is also normal. You can narrate for them a few times to let them see how it’s done, and you’ll find that the more they do it, the more natural it becomes.
During this time, it is also important not to interrupt any of the narrations, even to correct any errors in observation (depending on the error, correction can come at the end during the discussion). Generally, I just listen and nod attentively to encourage them to continue without adding anything to their narration. As Ms. Evans suggested: “Keep back your knowledge and be careful to draw from your pupil all he has noticed, before you volunteer your own observations.”
You may also get questions about specific parts of the piece during narration, but I prefer to save these for our discussion time after narration as you may find that one student will answer the questions of another student with their own narration.
As I mentioned before, there are other ways to narrate also. In our own co-op and suggested in the PNEU Teacher’s Handbook is partner narration: “When more than one child is being taught they can narrate to each other as this may help each child to visualise the picture better.” I ask the students to partner off and give each partner about one minute each to narrate to each other, then when we come back together, I ask for volunteers to share what they observed in general. Our students enjoy this form of narration very much.
Drawing the major lines of composition or sketching details of the painting are also forms of narration that I will discuss further below.
Discussion
I follow the narration by having them flip the prints back over to see what we may have missed and address questions that remained even after narration. On this topic, Ms. Evans said: “be careful only to answer the thoughtful questions, haphazard questions must be tactfully overlooked; don’t explain too much— ‘the most tiresome thing in the world is explanation.’ The teacher has a delicate position, she must show enthusiasm and yet keep herself in the background; you may carry your class away with you at the time, but it ought to be the picture which influences the class, not yourself.”
If a student asks what something is in a piece, be honest and tell them when you don’t know what it is, then take time later to look it up. If they ask why something is a certain way and you don’t know, turn that question around and ask them or other students why they think the artist may have done that (eg. why are there swirls in van Gogh’s Starry Night?).
If you research the piece beforehand and can answer these questions, then you can share that information. Otherwise, you may allow your students to theorize. You do not have to have an answer to all of the questions and, in fact, sometimes a definitive answer may not exist.
On the other hand, you may also find that art isn’t such a mystery as art critics and historians would have you believe, and you can take the piece at face value. As Ms. Plumptre wrote: “Of course there must never be any forcing of meaning where none is intended. Gainesborough’s Market Cart or Millet’s Girl Watering a Cow are straightforward pictures and should be taken as such.”
I also give a little background on the painting during this time if there is anything to share. If it was inspired by a particular story, I will either summarize or read that story based on how much time we have (or save this for the second week).
Many paintings are of Biblical scenes, and in these cases, I read the passage that goes along with that work. Others have been about specific people, so I might tell a little about that person and why the artist chose to paint them.
If there is some kind of symbolism present (eg. Mary is generally represented by a lily), I will draw attention to that as well. Sometimes, questions and observations will be offered during this time as well, which can allow for good discussion. These are also the types of key topics I include in my Picture Study Aids.
This part is usually not long at all at only about three to five minutes depending on how long the narration(s) took. However, short is okay!
It’s also okay if a student states that they don’t like a piece. However, if that is all they say, push back a little and ask them why they don’t like it. Allow them time to really think about that and form an explanation.
Upper Forms
This general outline for picture study can be used for students of all ages. However, if you are wanting to go a little deeper with your older students, that is okay as well, and I have actually found that discussion can be so much richer with upper-form students. Ms. Evans wrote: “A lesson to an older class is given on very much the same lines as the sketch I have just given. However, more historical information can be given; encourage the pupils to find information for themselves. The technique may be more carefully studied, and the different schools of painting may be compared. In leaving the new, do not allow them to forget the old, constantly refer them to the painters they have already studied, so that they may realize the value their former knowledge is to them.”
Ms. Plumptre mentioned older students specifically in her pamphlet as well: “From fifteen years old upwards Picture Study assumes a slightly different aspect. The history of the development of the ‘schools’ of Western European Painting is being studied in Mary Innes’ book, and the artist for the term takes his place in this development or in relation to other members of the same school. Moreover, direct attention will now be paid to the composition of a picture; the particular pictures studied fall into place as regards the artist’s work as a whole; there is some knowledge of his contribution to the history of painting and of his special characteristics.”
Second Week
Our picture study session during the second week of studying the same piece is generally shorter. We start by reviewing the artist we’re studying that term and then look at the piece and discuss it more, recalling things we talked about the previous week.
Some of my fellow Charlotte Mason moms also like to have their students draw the major lines of composition in the piece from memory during the second week. There is some debate about whether or not this practice should be adopted as some passages in various PR articles, pamphlets, and the original series discourage it.
On the other hand, there are also passages from PR articles, pamphlets, and the original series that actually encourage it, though usually for older students and sometimes with caveats. Ms. Evans offered this: “At the end of the lesson the children love to draw some detail of the picture from memory in charcoal, in pencil or even sepia. It is a great encouragement if the teacher is able to draw some rough representation of the same on the blackboard, and it shows them how to get some effect with a few important strokes. However, they must not look upon the lesson as a drawing lesson. Though they are drawing from the flat, I cannot myself see any harm in such drawing if it helps the children to appreciate and remember the picture.”
Interestingly, picture study is actually combined with drawing lessons for at least Form 4 in PUS Programme 94, and drawing the paintings learned from memory is specifically mentioned in this Programme, so I feel this is license to add this to your picture study time for your older students if you choose.
During the second week, if discussion doesn’t come easily, I might also ask open-ended questions such as, “if you were in this painting, what do you think you would feel (temperature, textures, breeze, etc.)?” or, “what do you think you would hear?” If there are people in the painting, I ask what they might be talking about, or if there is only one person, I ask what that person might be thinking about or looking at. You could ask where they think the light is coming from if the setting is indoors or what time of year they think it might be if it is outside. Any general questions that get them looking at and talking about the piece are good.
So this is our general format for picture study. Again, I want to emphasize that even after all of this, even if your picture study time consists only of looking at the piece and narrating, that is okay! By intentionally setting aside time each week for your students to really look at a piece of art, you are giving them a gift.
“His education should furnish him with whole galleries of mental pictures, pictures by great artists old and new;––…–– in fact, every child should leave school with at least a couple of hundred pictures by great masters hanging permanently in the halls of his imagination, to say nothing of great buildings, sculpture, beauty of form and colour in things he sees. Perhaps we might secure at least a hundred lovely landscapes too,––sunsets, cloudscapes, starlight nights. At any rate he should go forth well furnished because imagination has the property of magical expansion, the more it holds the more it will hold.” (Vol 6 pg 43, emphasis mine)




I’m very much enjoying this series, Rebecca. Thank you for investing the time to help us all embrace this important yet often overlooked aspect of our children’s education.
Thank you, Dawn! That means a lot coming from you!
After this morning’s failed picture study, I really appreciate your explanation and encouragement. It’s good to know that it doesn’t have to be the rocket science I’ve been making it in to. Thank you so much for this post.
I am beyond grateful for your posts. Your study and compilation of these things is SO very helpful. I am preparing to begin a year with a co-op and the simplicity of how to teach picture study and these resources are just what we need to improve our efforts. Thank you, thank you, thank you.
You are so welcome, Shelley! I’m just really glad to hear my posts and PSAs have been helpful! 🙂
Dear Rebecca, Thank you very much for the detailed explanation of how a picture study should be in your three articles.
I am new to Charlotte masons. I love the idea of picture study. Thank you.
Rajanigandha N
India