Simple Ideas for Keeping a Homeschool Year Record
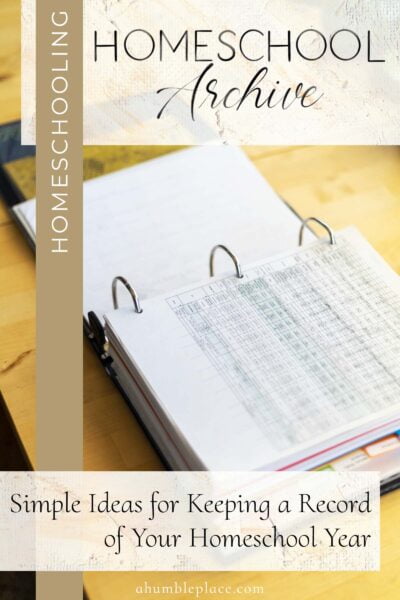
I have been putting together a homeschool year record of our school days for both of my kids each school year since we began homeschooling in 2016. In this post, I’m sharing why you might want to create one, the supplies I use to assemble ours, and how I organize everything!
Do you need a homeschool year record?
If you don’t have state requirements to submit a homeschool portfolio for review each year, you may wonder why you need a homeschool year record. It’s true that you don’t necessarily need one, but I have found that having this archive of our previous years is not only a great idea for knowing what we went over, but it’s also a nice little time capsule of our school year. I also appreciate being able to see the progress we made in a given subject, whether it was copywork, grammar, or handicrafts.
It also helps me when I sit down to do my year-end review to have everything in one place, which is an effective way to decide what changes need to be made or what I’d like us to do in the coming school year. And, of course, it’s always just a good idea to keep good records of everything you did in a given year for any legal requirements your state may have as well.
Supplies
These are the supplies I make sure I have on hand at the beginning of each school year so I can put everything into the main binder as we go through our year.
- 3-Ring Binder for each student (I like 3-inch binders, and I usually get a different color for each student)
- Hole Punch (this one punches up to 40 sheets and works so well)
- Dividers in Assorted Colors or Pastel (these are plastic and extremely durable)
- Markers or Label Maker (for labeling the tabs)
- Sheet Protectors

What should you put in your binder?
Here are examples of the things we’ve included in our binders:
- First day of school sign (which I still do every year!)
- Homeschool Attendance records (when they were not in my homeschool planner)
- Umbrella school enrollment records
- Piano practice records
- Term overviews (which also include a list of the books we read, but you could include this separately as well)
- Calendars
- Field Trips Information
- Weekly lesson plans (when they were not in my homeschool planner)
- Student weekly assignments
- Morning time plan sheets
- Poetry readings (printed out from AmblesideOnline)
- Copywork
- Spelling/Dictation exercises
- Grammar exercises that were not done in the workbook
- Letter-writing exercises (from Teach Your Child to Read in 100 Easy Lessons)
- Nature study activities that didn’t go in our nature journals
- Science drawings for Form 2 students
- Science notebooks for Form 3 students (I slip these into the pockets on the covers of the binder)
- Drawing exercises
- Brushdrawing exercises
- Online Program information (e.g., Nature’s Art Club, which is what we use for drawing lessons)
- Extracurricular activities (e.g. archery)
- Math sheets that needed to be removed from the math workbook
- Hymn and folksong selections
- Composer study selections
- Co-op handouts
- Recitation selections
- Exam Work
- Picture study prints
I usually put any work samples that were written down or drawn on loose paper. For example, all of our drawing exercises from What to Draw and How to Draw It were included. For copywork, I bought three packs of lined paper, which are inserted as my kids complete a copywork sheet. We had a few exercises in our grammar curriculum that required extra paper, which also went into the binder. And all of the papers handed out in our former homeschool co-op were kept this way also. At the end of the binders, I insert sheet protectors and put in all the picture study prints we looked at for the year. And any handicrafts that will fit into the pockets in the binder covers (like origami) are also kept there.
I also keep track of basic information and administrative-type records in our binders. This includes things like each student’s attendance sheet (these are now part of my homeschool planner, but I used to keep them in the binders) and the official enrollment letter we get from our umbrella school at the beginning of each year. I also put in all of our term overviews (I copy the ones from AmblesideOnline into a spreadsheet and modify it to fit our needs before I print it out for my weekly planning) and Morning Time rotations as well. Throughout the year, we also have a calendar propped up on our school table where we keep track of birthdays, feast days, nature group meetings, appointments, and other important dates, and I make a copy of these calendars to put into each binder.
I also store our exams here. For the oral exams we did in the past, I recorded our exam sessions and then transcribed their narrations (Dropbox has a handy feature that does this automatically!). I then print those sheets out and insert them into their own section at the end of the binder.
These binders are a great way to keep all of those loose papers related to your homeschool that accumulate throughout the year. What you include is really up to you, so do what makes sense for your family’s needs!
What should you not put in your binder?
Honestly, there are no rules for what you can and cannot put in your binder. I have chosen not to put written work in the binder that is already in another type of bound book. For instance, all of our math worksheets, spelling exercises, and some of our grammar exercises were done in workbooks, so I have kept those separate. However, when we’re done with those books, I will store them with the binder, and sometimes, it’s even wide enough that I can slip them in between the cover and the first page so everything is stored together.
How should you organize your binder?
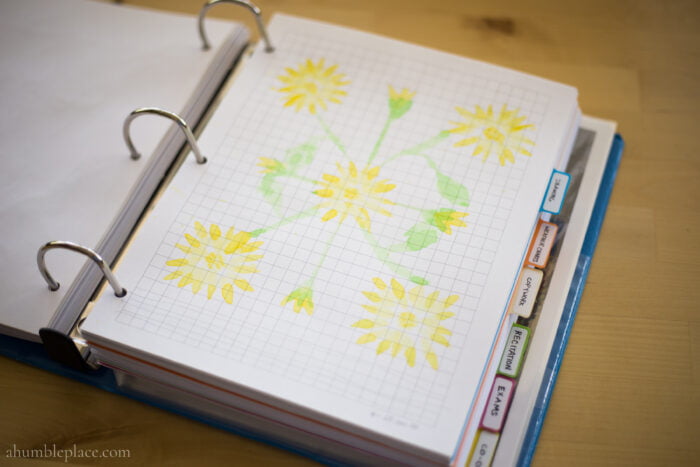
Here’s an example of how I organized my son’s Year 3 binder:
- Front pocket: first day of school sheet/random piano sheets/character cards for Shakespeare
- Administrative paperwork (umbrella school letter, term overviews, calendars, Morning Time plans)
- Hymn/Folksongs for the year (organized by date)
- Brushdrawing exercises
- Drawing exercises
- Weather charts (we studied weather for nature study that year)
- Copywork
- Recitation selections
- Exams
- Co-op
- Picture study prints (organized by date)
- Back pocket: miscellaneous piano sheets
And here’s an example of Year 7:
- Front pocket: Two science notebooks (we covered four science topics this year, so half of the notebooks went in the front)
- First day of school sheet and administrative paperwork (calendars, term overviews, student assignment sheets)
- Hymn and folksong sheets, poetry readings, recitation readings
- Spanish work
- Copywork
- Dictation (spelling) exercises
- Nature Study & Science (loose sheets) work
- Map drills
- Typing exercises, written narrations for various subjects, news articles that were read this year
- Exam questions and answers, picture study pieces
- Back pocket: Two more science notebooks
I usually buy the binders at the beginning of the year and keep them in a cabinet in our homeschool area. In the same cabinet, I have stackable file trays with five shelves, two of which are where the kids put their loose sheets of work. Once a week, I aim to put those sheets where they belong in the binder, but I often fall behind on this, so I do it at the end of the year.
I start by inserting all of the papers I want to keep in the binder, grouping them by subject, but I don’t put labels on the dividers until I’m done putting all the papers in. That way I have an idea of how many sections or dividers I’ll need and from there can determine how I split up the work. For instance, if I don’t have a lot of sections from our day-to-day school, I can split up the co-op handouts into sections (e.g., we always did composter study and nature study in co-op, and I could give each of those their own sections, or I could just put all of the co-op handouts in their own section).
You also have the option of not doing sections at all, which is what I did the first few years. I just grouped the papers by subject, but I have found that the dividers make it a lot easier to find things later.
It’s really a simple system for homeschool recordkeeping, which has been nice to have not only to check what we did in a given year but also as a little trip down memory lane. 🙂





What grid paper do you use for brushwork lessons? All I can find is math graphing paper
Thanks!
A friend of mine put together a brushwork painting bundle several years ago that included graph paper, so I use that. If you happen to be coming to the Charlotte Mason Educational Retreat in February, it may be for sale there this year!