Teaching Sewing as a Handicraft for Homeschoolers (+ a free printable!)

Sewing is an excellent option for a handicraft in your homeschool, especially for younger children. When your students learn basic sewing skills at younger ages, they can build on those skills as they grow older and gain confidence in their ability to produce beautiful items and learn to repair and take care of their clothing and other textiles.
I began teaching my oldest to work with a needle when he was around two or three years old. I got the idea from The Creative Family by Amanda Blake Soule and gave him an embroidery hoop with a piece of burlap fabric in it, a tapestry needle, and some embroidery floss and let him “sew” to his heart’s content. It was a great way for him to not only learn the motion of pulling a needle through fabric, but it also planted an interest in him for sewing.
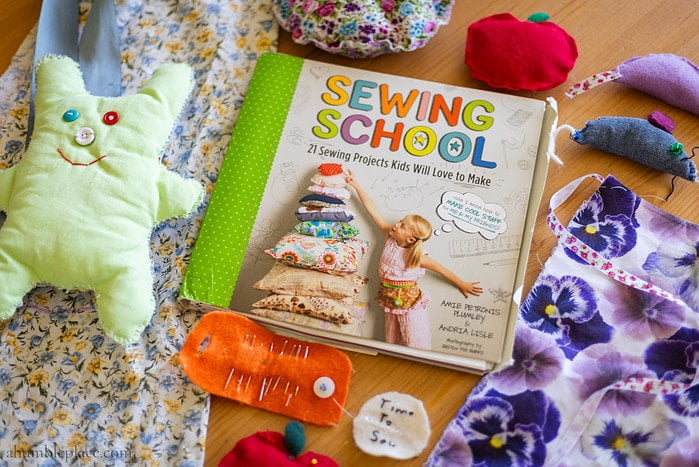
When he was around seven or eight years old, I picked up a copy of Sewing School, put together a sewing kit for him, and he took off with it, picking out several of the projects to do on his own and using the skills he learned to design and make other things. He has also expressed interest in learning how to use my sewing machine, so I hope to explore this in the future.
His little sister has also expressed interest in sewing but is not as much of a self-starter as her brother, so I knew I had to offer her more guidance. We talked about including sewing as a handicraft in our homeschool year when she was going into second grade last year, but plans changed, and we didn’t get around to it until this past school year. We again turned to our battered but loved copy of Sewing School as a guide. In this week’s post, I’m sharing how we did it for anyone else who is considering including sewing in their homeschool!
What did the lessons look like?
The first section of Sewing School has 12 lessons providing an overview of sewing. I read these lessons to her and had her narrate what she heard before we did any associated projects or activities, like putting together a sewing kit, sewing different kinds of stitches, or sewing on buttons, among other things.
When we got to the projects, I set aside a little time each Friday for her to pick one out, and then we looked over the supply list and read the directions together to make sure everything was clear for her. If she needed any other supplies to complete the project, we made a trip to the craft store either that weekend or early the following week. She then knew she had to have it completed by the Friday two weeks after we read over the project together. This worked exceptionally well as it gave her plenty of time to finish the projects and allowed her to become a little more independent with her schoolwork.
How much of the school year does this take?
When I had the idea of including sewing as our handicraft for my daughter’s second-grade year, I thought we would do it over a term. My handicraft ideas didn’t go as planned that year, and we switched from doing a different one every term to doing just two over the entire year, which worked much better for us. Because of that, this plan is designed to be used over a 36-week school year.
How did we lay it out?
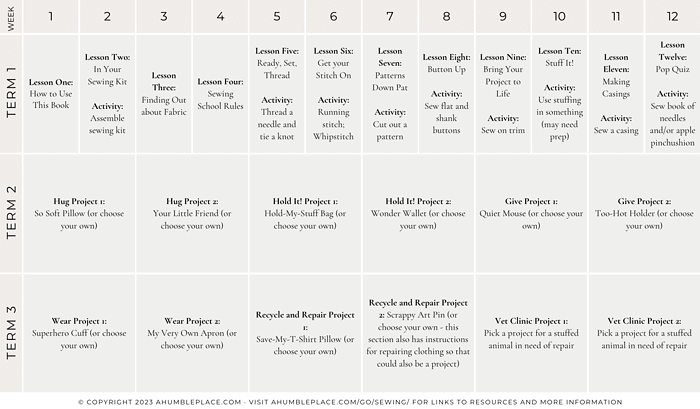
In the first section, with the overview of sewing, I divided those lessons over the first term, so we did one per week, as outlined above.
After that section, the book includes six more sections for different types of projects for things like stuffed animals, bags, gifts, things to wear, how to repair clothing, and how to mend your stuffed animals. You could split this up in a few different ways, depending on how quickly your student gets through the projects. I chose to give my daughter two weeks for each project, meaning I planned two projects from each of the six sections (for a total of 12 projects) over the remaining 24 weeks of the year. I allowed her to choose which projects she wanted to do from each section.
There are a total of 30 projects in the book (if you count the extra instructions for how to do repairs), so you could also plan one project per week if your student shows an interest in that. Or you could choose one project from each section and give them four weeks to work on it. It’s a very flexible book with which to work.
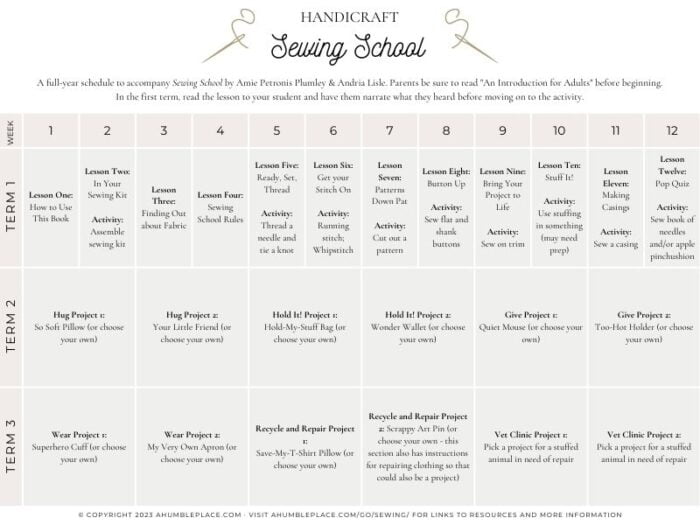
For those of you who like it all laid out, I have a free printable schedule to accompany the book that you can download below!
(If the form does not load, you can also sign up here.)
I hope this post has been helpful and encourages you to try sewing as a handicraft in your homeschool!





I’m excited to try this! I love to sew and want my daughter to learn, but going from nothing somehow seems overwhelming even though I’ve been sewing since I was a girl. This looks like it would be a great way to incorporate it and make it fun for my daughter. Something more like a textbook than just Mom telling her what to do next. 😉